Go to eSign.utah.gov/login and use your UtahID to login to your account
If you do not have an account, you will need to request one. Click here to contact us about getting an account created for you.

Click on the Send tab


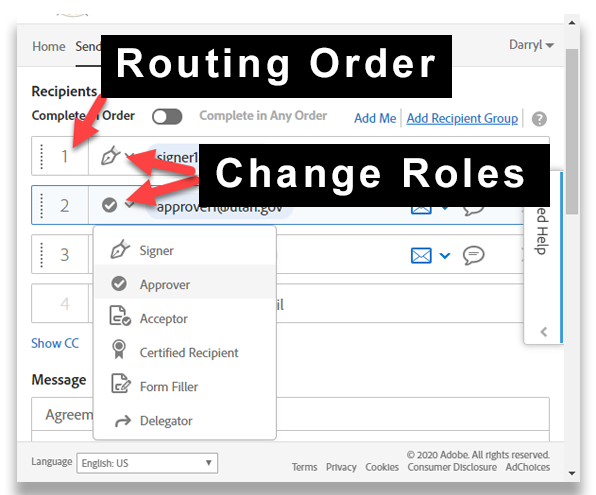
Identify who needs to participate in signing and/or approving this document
– Enter the signers/approvers in the order they will participate. Also, ensure that you assign the proper role of each participant.
– Those listed as “Signers” will need to have a signature field assigned to them. Those needing to just initial the document can be marked as an “Approver.”
Enter the title of the agreement and the message
The agreement title will reflect in the email notifications sent to each participant along with the message. The agreement title you define will also be the title reflected in your Manage page of your Adobe Sign account dashboard.


Place the location of the signatures and any additional text fields on the document
Ensure that you select the correct participant when assigning each field.

Hit the “send” button when done.
The agreement will be sent automatically to the next participant. All participants will receive a copy of the document once completed.

You can track the status of your agreement by logging in to your account and clicking on the “Manage” tab. Go to the Tutorials page to learn how to manage your agreements or click on the LEARN MORE button to the right!